https://www.renaultforums.co.uk/showthre ... 93&page=12
This job is not for the faint hearted. You will need various tools including but not limited to 10, 13, 16, 18mm spanners and sockets. A 1/4" drive ratchet driver for access to tight areas is essential. A laptop running XP or better and a cheap microphone is required. Also needed are two axle stands and a trolley jack.
The following account is what I did and how, described to the best of my ability. TAKE SENSIBLE CARE WHILE WORKING. Read the factory pdf file from start to finish before attempting this job.
1. Here is an image of the parts you need:
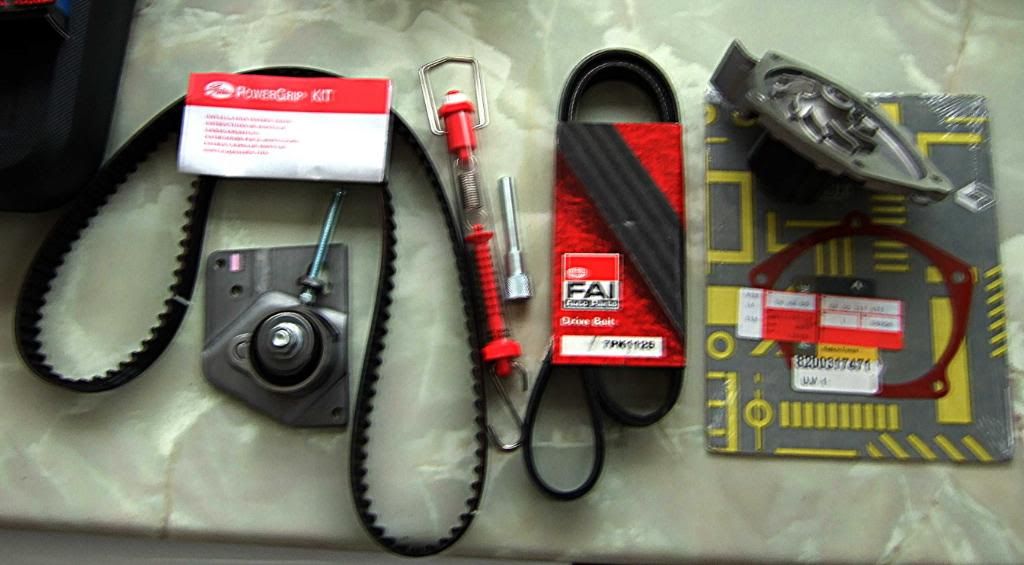
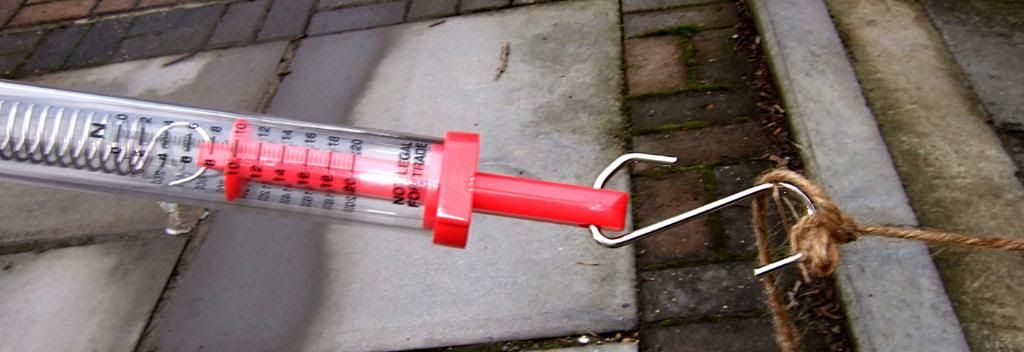
From left to right: Gates Powergrip timing belt and tensioner kit (or equivalent) - source ebay. The M6 x 75mm set screw was purchased locally for 12p. A spring balance - source ebay (£2), timing locking pin tool MOT 1541 (NOT REQUIRED), aux belt (ebay), coolant pump (ebay), gasket (Renault parts dept). Don't skimp on the gasket - those sold with the pump are not of a sufficient quality for the job.
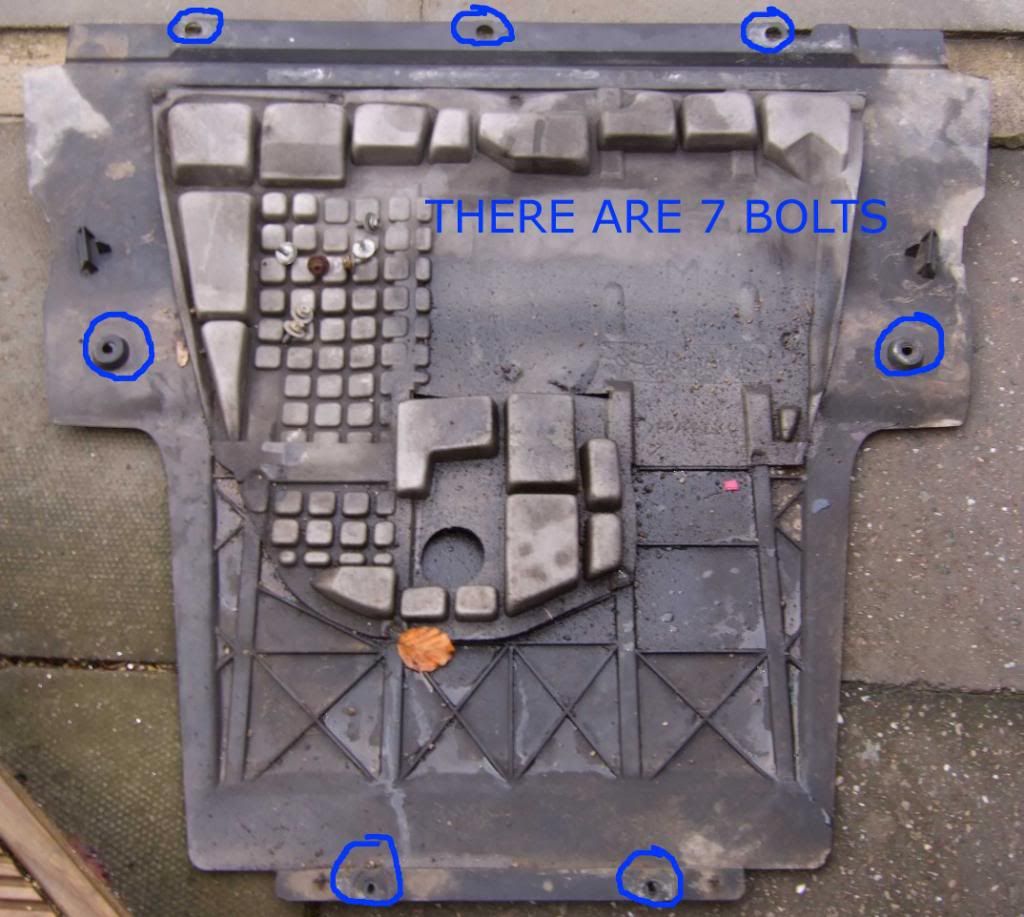
2. Unlock the car and open the boot and bonnet. Disconnect the battery earth. Jack up the front of the car and remove the driver's side road wheel. Remove the under tray - there are 7 M10 bolts - see image below.
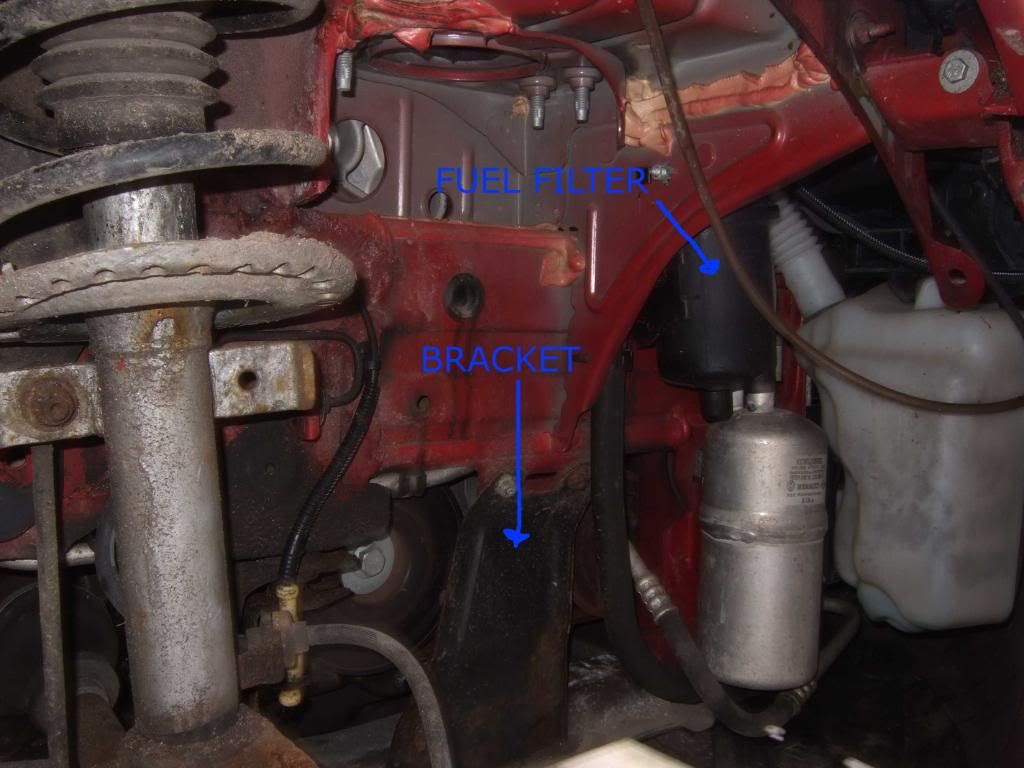
3. Remove the clips securing the front section of the driver's side wheel arch cover. Remove this from the car. You will see:
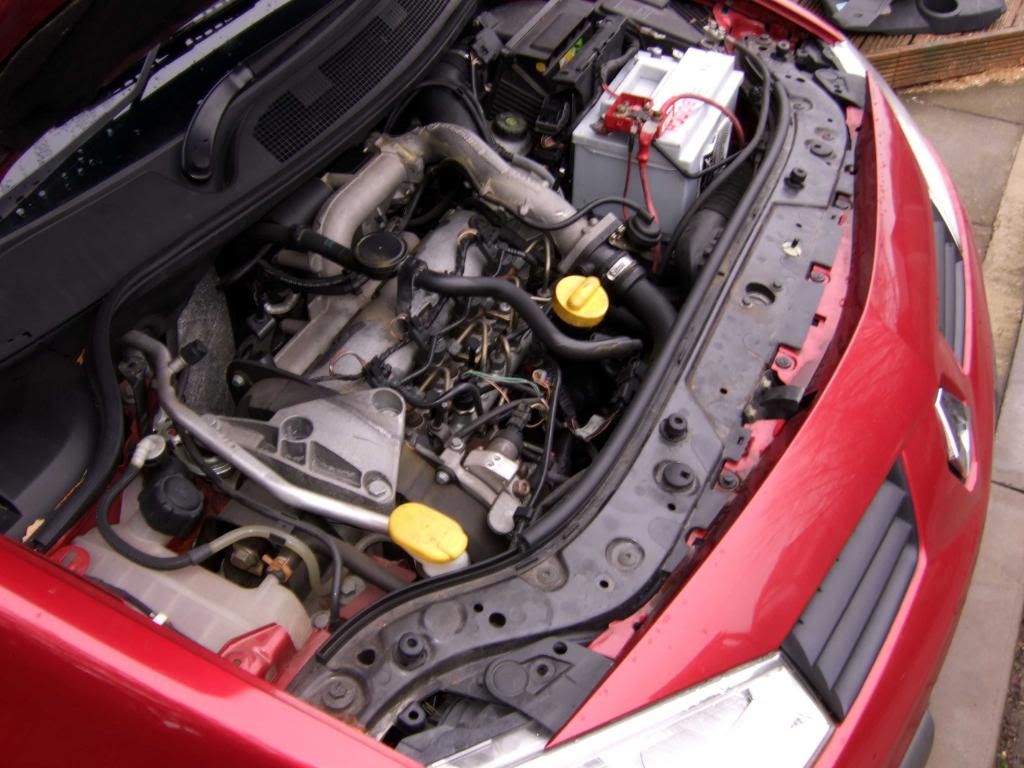
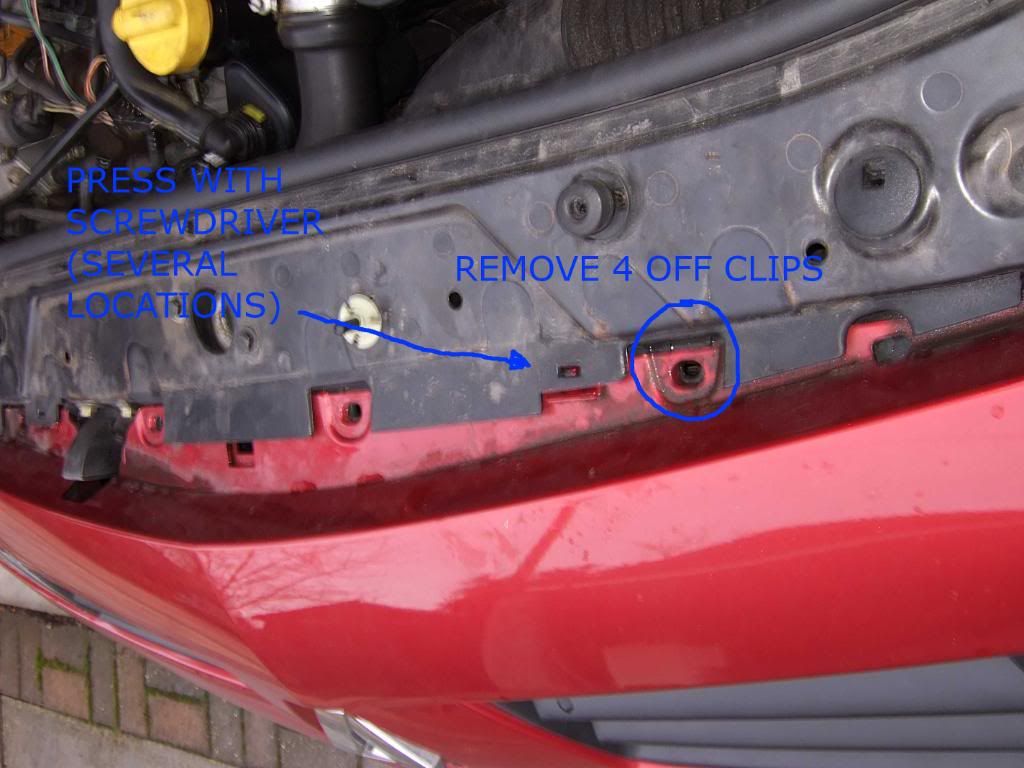
4. Under the bonnet remove the clips securing the trim from both sides and the front section revealing this:
5. Remove the bumper. Be careful and have an assistant on hand to help. There are more plastic clips to take off at the top, plus you must use a small screwdriver to depress the locking clips at the top. There are four of them, and they break easily. If you have fog lights, disconnect the wiring loom when the bumper is loose (yellow connector - not shown) Proceed with caution:
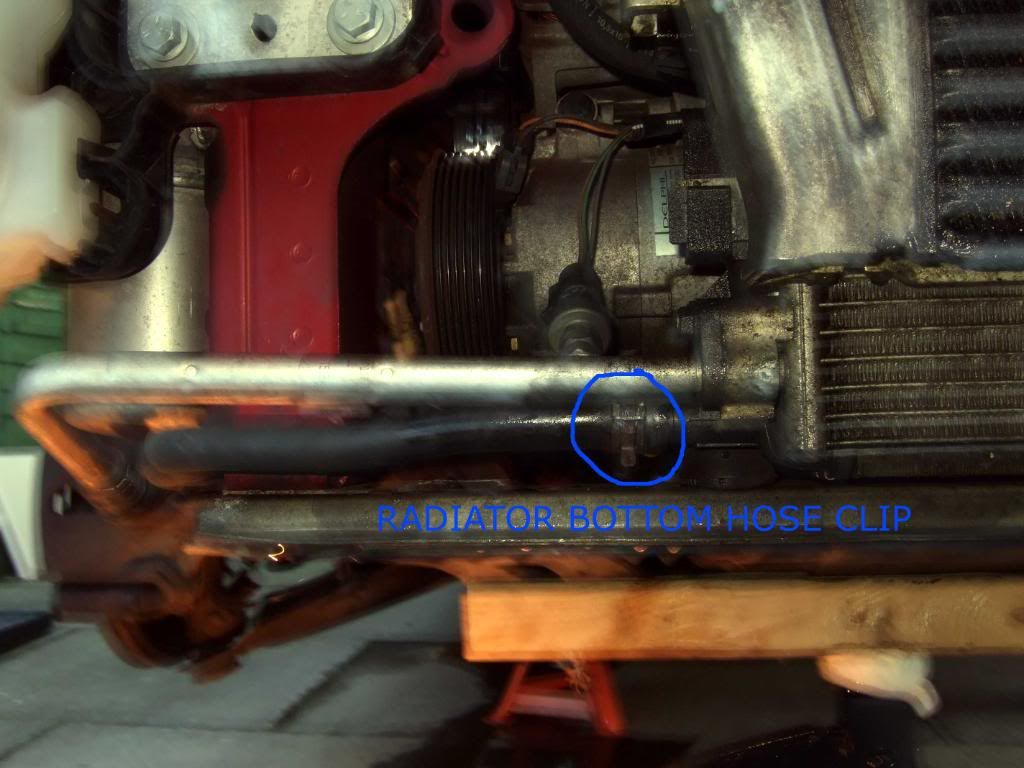
6. With the bumper removed, drain the coolant by opening the filler cap and removing the radiator bottom hose - save the coolant in a clean container if it is new, or flush it away for safety. It has a sweet smell and is toxic - animals like to drink it and then they die. There are two bleed screws behind the battery where pipes pass through the bulkhead to the internal heater. Open them (one turn counter-clockwise). The coolant comes out FAST. Direct the hose into a container. Allow 10 minutes for full drainage. Hose any paintwork that has been splashed immediately.
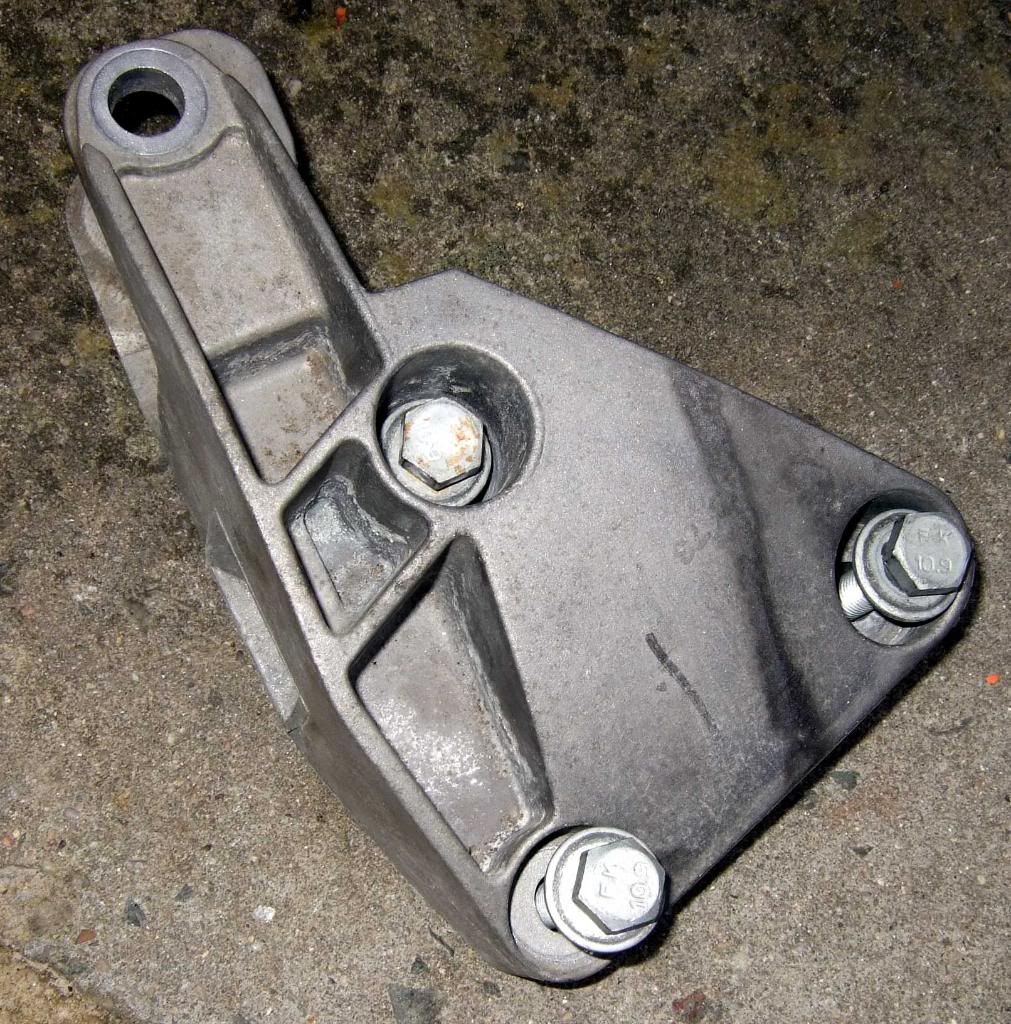
7. Remove the bracket shown in step 3 to reveal:
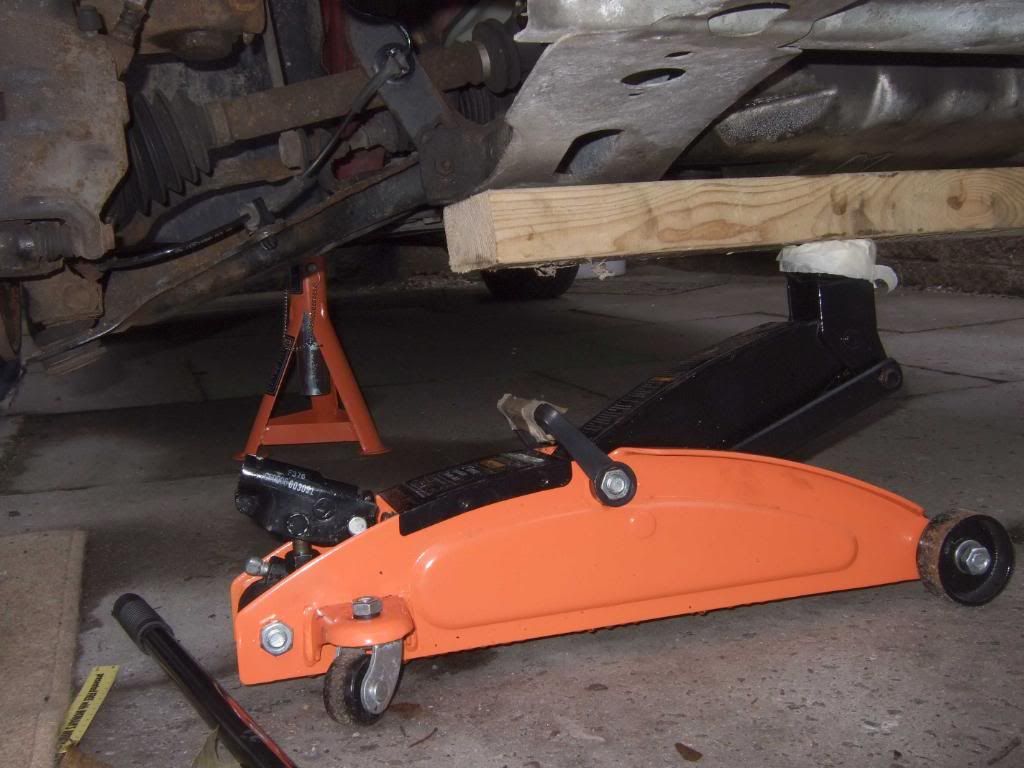
8. Support the engine with a block of wood (I used 2x4) and a trolley jack - proceed carefully - lift the engine only 5mm or so:
9. Unbolt the engine mount through bolt (not shown clearly) (18mm spanner) and the engine mount bolts x2
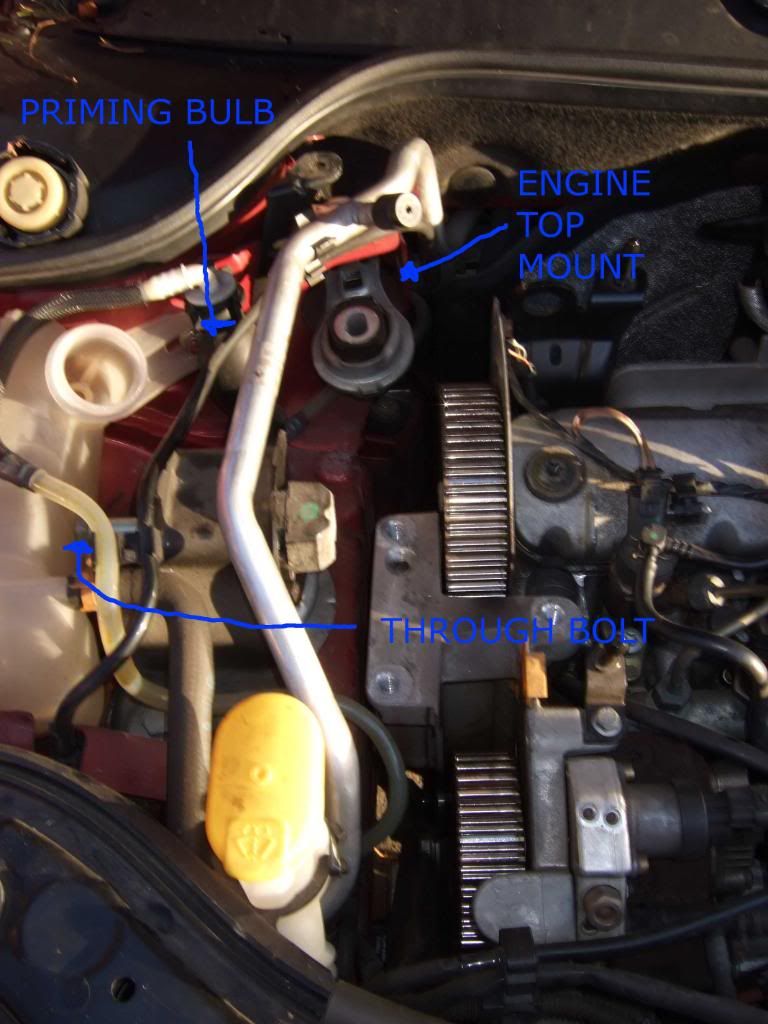
Note that the bolt will not come out.
10. Remove the link (16mm bolts):
11. Use a 16mm spanner on the aux belt tensioner and turn anti-clockwise to relieve tension. Note the factory and Haynes manuals specify clockwise - this is INCORRECT. An assistant is useful to get the belt off.
12. Have an assistant apply the brakes with the car in 4th gear AND TWO ROAD WHEEL BOLTS TEMPORARILY RE-FITTED. Unbolt the pulley wheel and put it to one side. Refit the bolt and torque to 40Nm.
13. Unscrew 4 bolts holding the timing belt cover on. It is removed FROM BELOW. Twist it around - it isn't easy to get off.
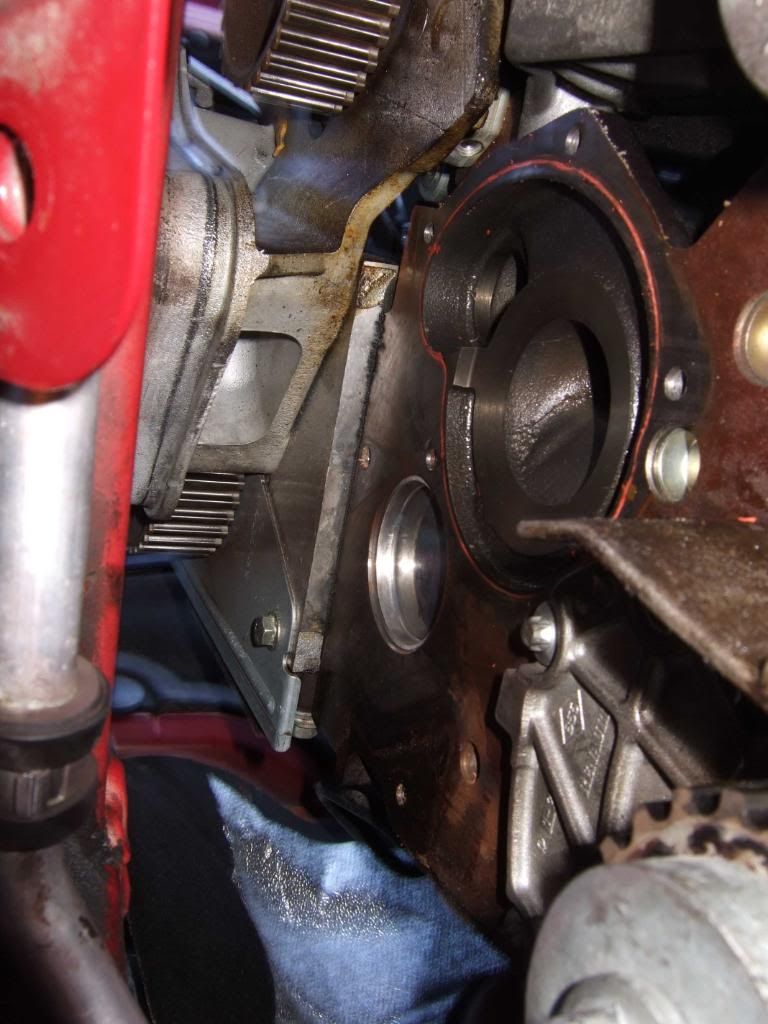
14. Rotate the engine clockwise by turning the pulley bolt until #1 cylinder is at top dead centre. This image shows when this is the case:
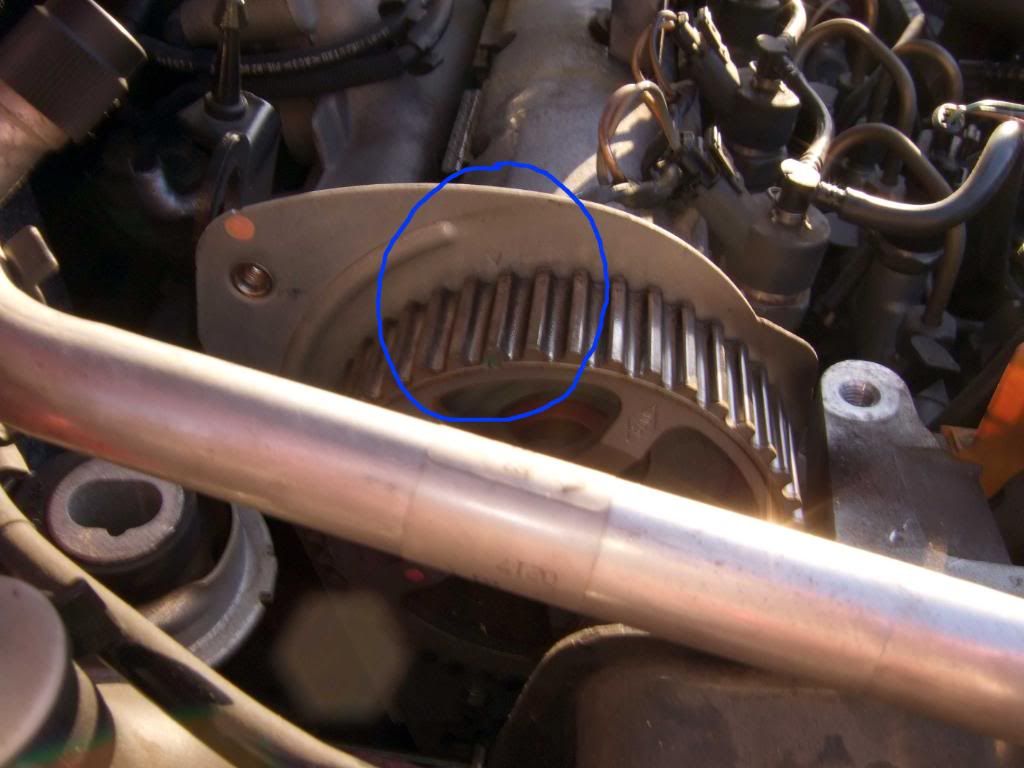
Check that you can see this:
15. Mark the position of the sprockets (not the high pressure fuel pump - this is un-timed) to the bodywork with a white pen or paint. Note you do not need to used the timing pin tool.
16. Ease the belt off and remove it. Ensure neither camshaft or crankshaft is disturbed <-- VERY IMPORTANT
17. Compare the old and new belts. Check for length and number of teeth.
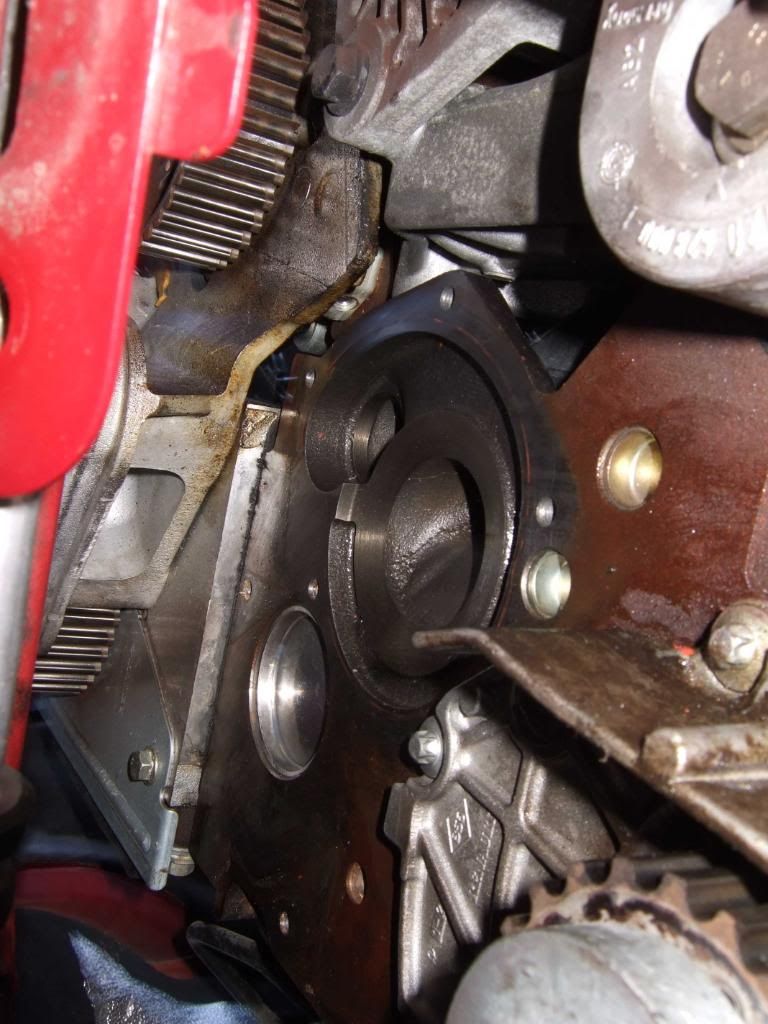
18. Remove the coolant pump:
and clean the old gasket off the block. I used a 39p wooden spatula from Sainsbury's.
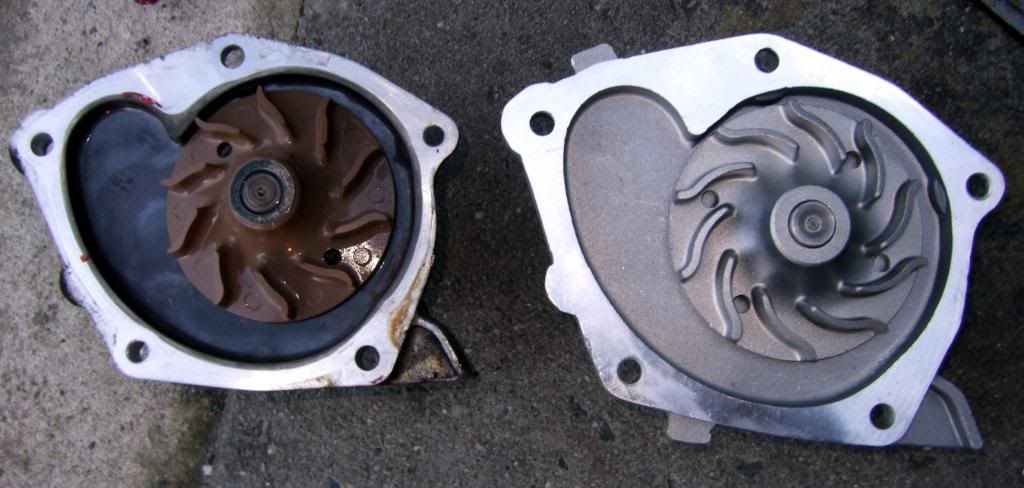
19. Compare the old and new pumps for hole patterns. Refit using new gasket. Note the new unit on the right has a metal impeller:
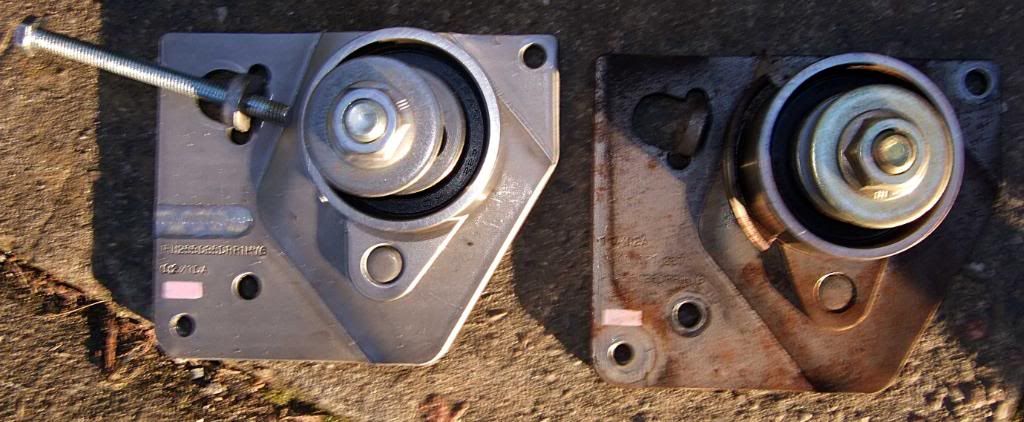
20. Unscrew the belt tensioner centre nut (NOT THE MOUNTING PLATE - THE FOLLOWING IMAGE IS MISLEADING) and replace the bearing. Fit the M6 screw from above:
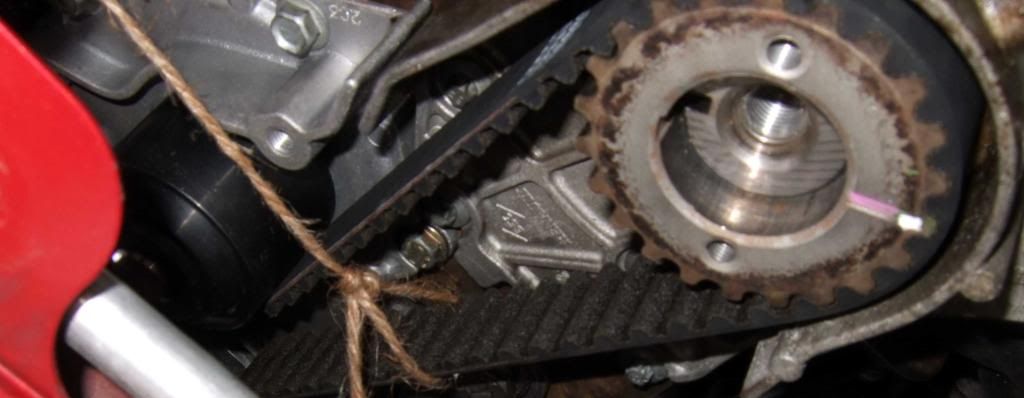
21. Fit the new belt. Note the arrow pointing clockwise. The white bands on the belt will correspond to the markings on the sprockets you have already made (note there are several bands in different places - you must identify the correct ones before fitting). Start at the crankshaft and work around the various cogs leaving the last bit to the tensioner. I found the belt was so tight to get on that I had to tie a piece of binder twine to it and have an assistant pull hard upwards from under the bonnet while I pushed it into place. Count 28 spaces (not teeth) between the camshaft and the fuel pump. Spin the pump around to align the band on the belt to the mark on its sprocket if you want to be tidy.
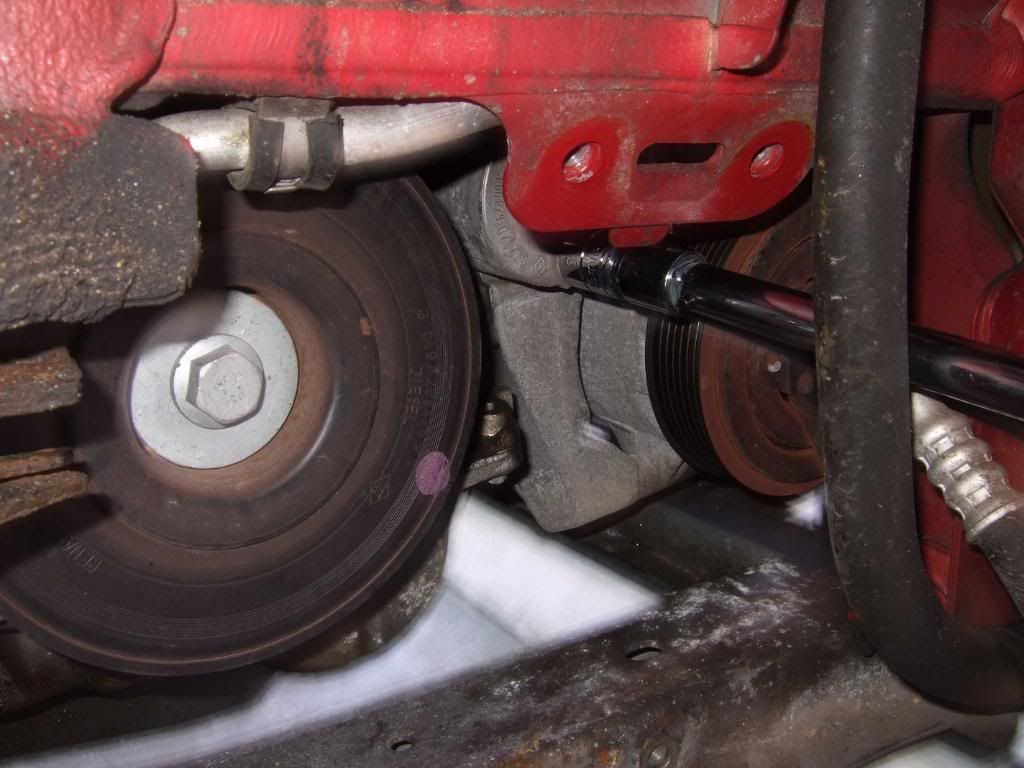
22. Remove the pulley bolt and REFIT the aux belt PULLEY and the bolt again. If you have a micrometer, check the bolt is no longer than 49.1mm from shoulder to tip. If longer, obtain a new one. Torque to 40Nm. You should be back to this image now:
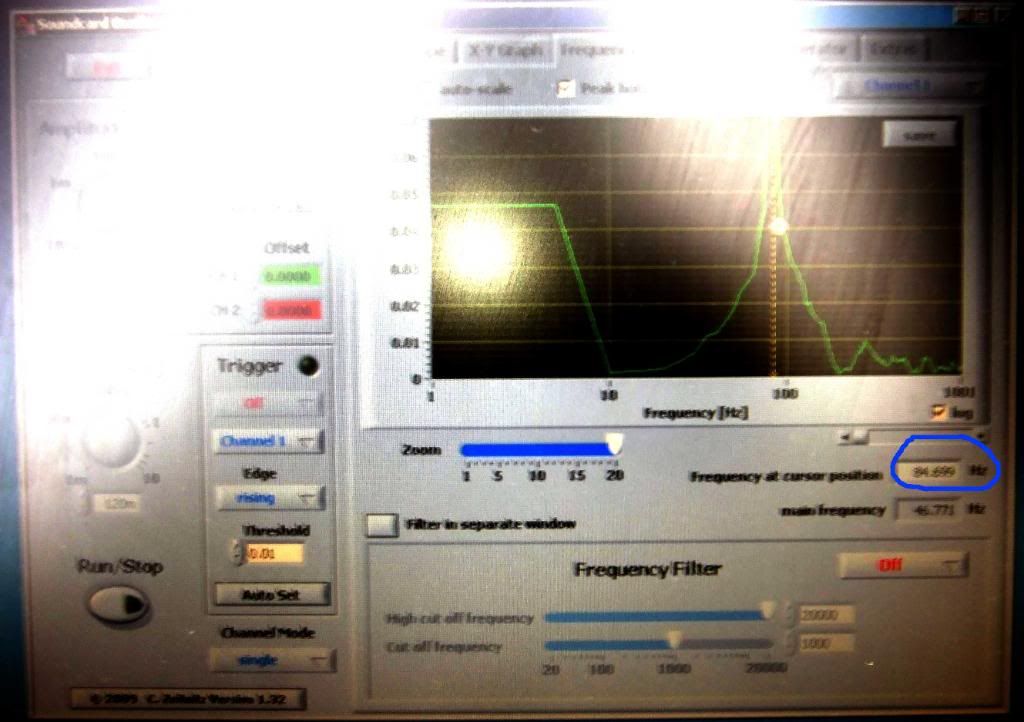
23. Use the software described in the first part of this post to check the belt tension (90 +/- 15Hz). Pretension with the spring balance thus (11Nm):
Adjust the M6 bolt to achieve this value. Tighten the tensioner bolt when you have the correct reading:
24. Turn the engine through a few revolutions using the pulley belt. Don't be alarmed that the marks on the belt appear to misalign. This is just a function of the number of teeth. Eventually you will be back to the marks matching up.
25. Repeat section 23. Re-measure the tension to obtain 80 +/- 15Hz)
26. Have an assistant closely monitor the belt under the bonnet. Start the engine (without coolant or aux belt). Run for 30 seconds or so. Expect lights on the dashboard. No harm will be caused. Diesel engines will easily stand stand this situation. My engine fired first time and ran perfectly well.
27. Refit the aux belt with an assistant to aid (the belt is tight and you need one person to hold the tensioner off). Check that the grooves run true (several more revolutions by hand).
28. Re-fill and bleed the coolant. Re-assemble in the reverse order as described.
29. Start the engine and let it idle until the radiator fan starts. Test drive.
I hope this was a useful guide. Please post any errors or omissions and I will revise it.
DL