The reasons for undertaking this work include a broken release button, amongst other things...
Before starting, park the car on LEVEL GROUND and CHOCK THE WHEELS. TAKE ALL REASONABLE SAFETY PRECAUTIONS. This is intended as a guide only. Use it at your own risk.
Read this entire article before starting.
You need to obtain either a brand new assembly or one sourced from a scrap yard. I got mine in the UK by phoning 0800 0741313 and it cost £83 including VAT and delivery. You could probably source one cheaper if you are more resourceful than me.
Below is a list of the tools that you will need:
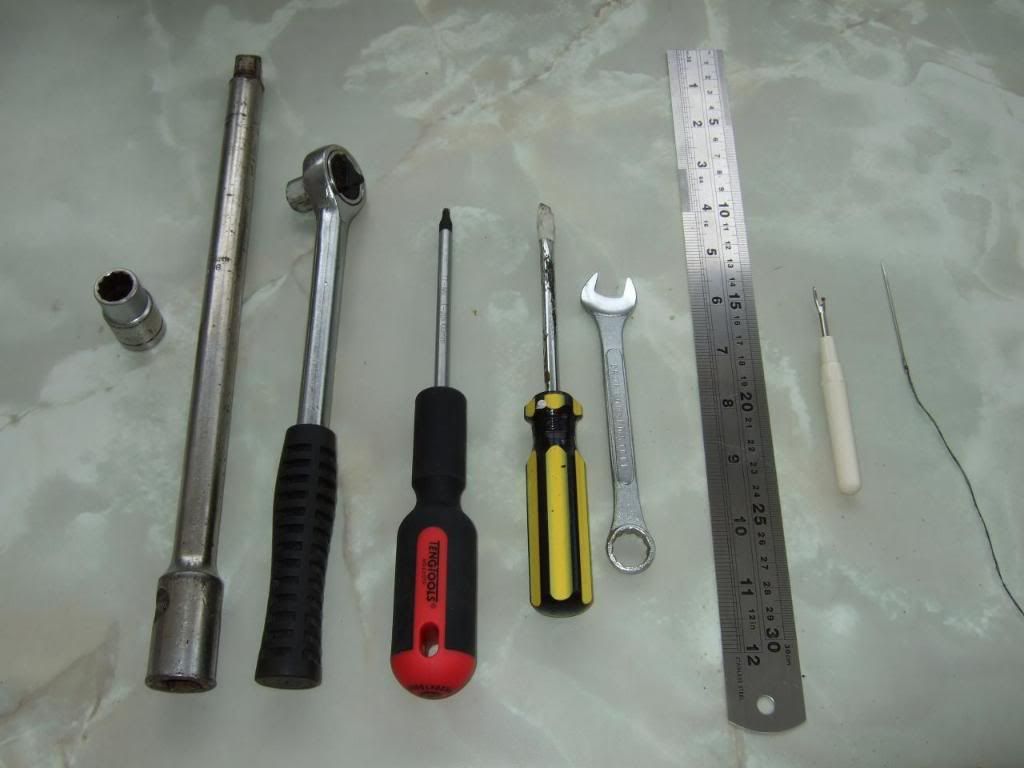
From left to right, 13mm half inch socket, 250 – 300mm extension bar, half inch ratchet, T20 size torx screwdriver, flat blade screwdriver wrapped with masking tape to protect plastic trim when prising, 13mm spanner, steel ruler, sewing quick unpick (or a knife) and sewing needle with black thread doubled up.
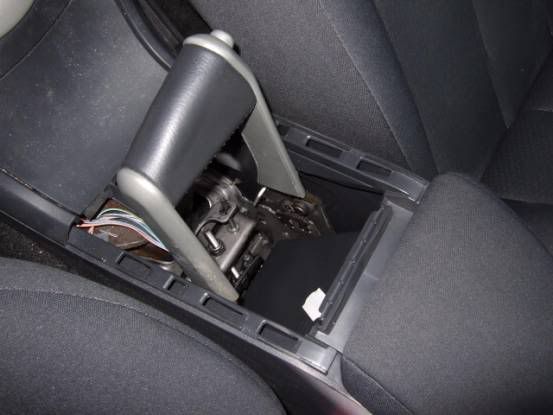
1. Remove the trim at the front of the handbrake as pictured below. It prises at the sides and lifts up and off.
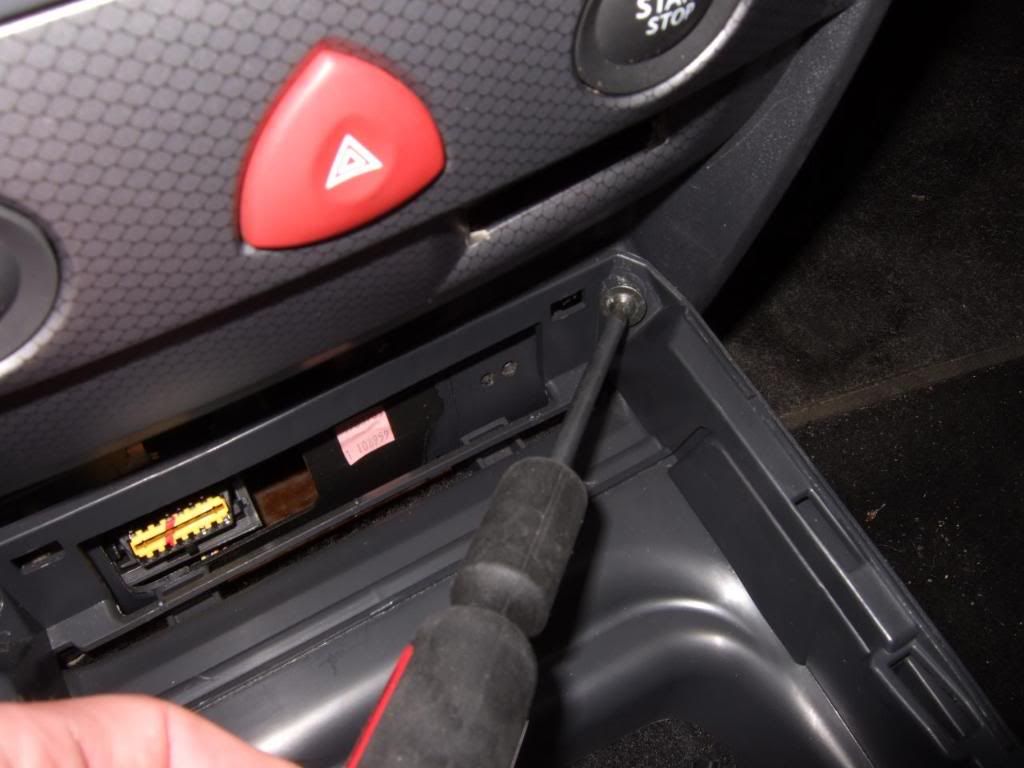
2. Remove the plastic trim in front of this, pictured above in position. Prise at the sides of the narrow end (near the cables) – two lugs hold it in position. Also remove the small panel under the start button. Behind this you will find the ECU code reader socket. To do this, push down and pull forward the small handle shaped bit (see other pictures further down).
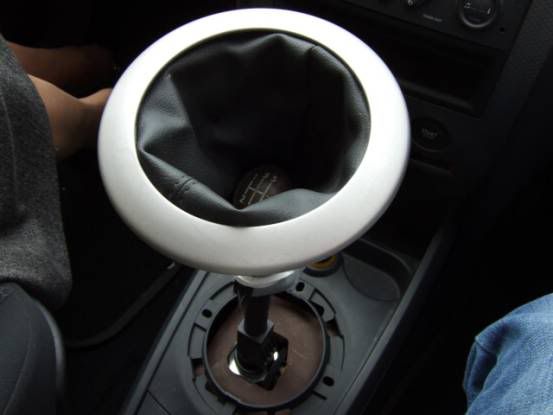
3. Unclip the gear stick gaiter – you can do this by hand – feel where the lugs are and pull gently. Lift it up over the gear knob (don’t try and remove that – it’s a nightmare) as shown below. You can’t take off the centre console without removing the gaiter. The easiest way I found to do this was to use the quick unpick sewing tool to undo about 20–30 mm of the stitching directly under the gear knob. You might also need to cut a wire tie with a sharp knife. Only undo enough stitching to open it up enough to remove the gaiter over the gear knob.
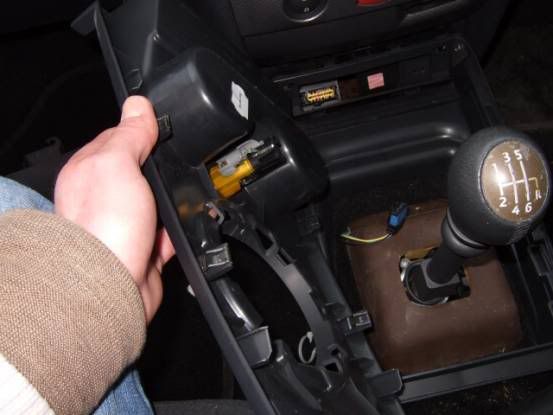
4. Next you need to remove the top portion of the centre console (the part holding the cigarette lighter socket and cup/ashtray holders). Prise it along the length at the sides where it is secured by lugs. Once loose, reach underneath and disconnect the cigarette lighter wiring (as shown below – blue coloured). The lighter socket remains in the part you have removed (the yellow bit near my hand).
5. Now you are in a position to remove the centre console using the torx screwdriver. There are 4 screws. Two are at the front:
and two at the rear, one each side (slide the front seats forward for access) - note Haynes mention only one (this got me a bit puzzled for a while!):
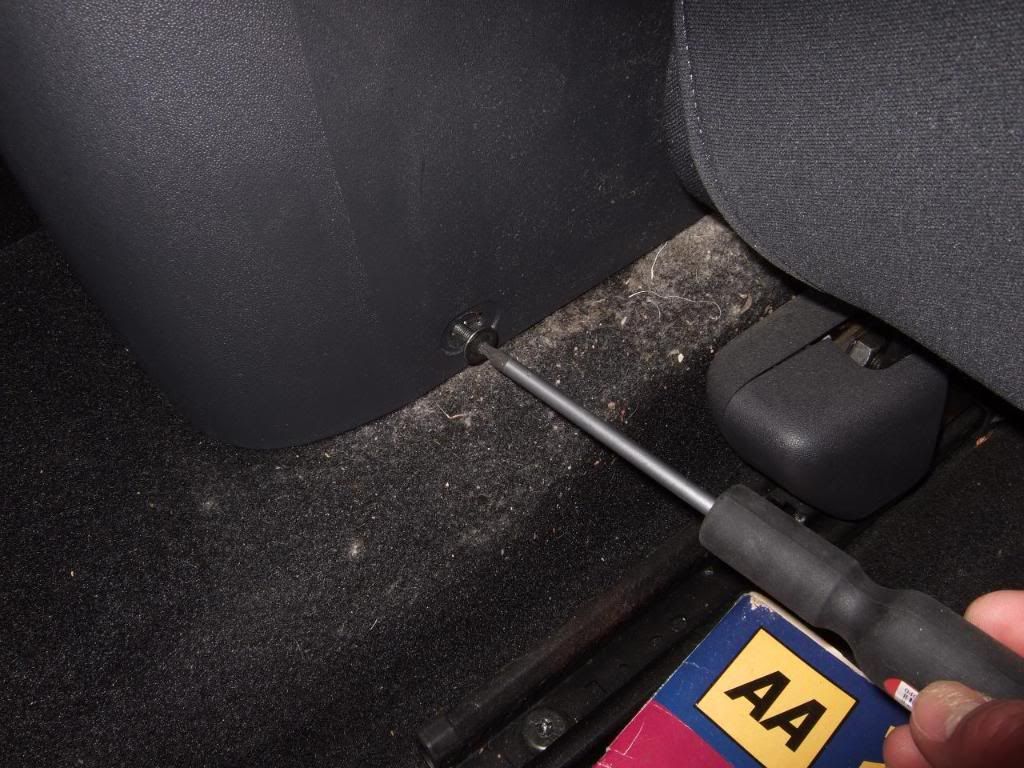
The centre console will now pull backward and upwards and out of the car.
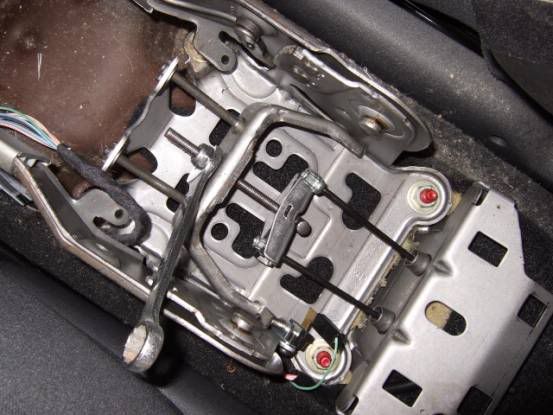
6. You should now see this:
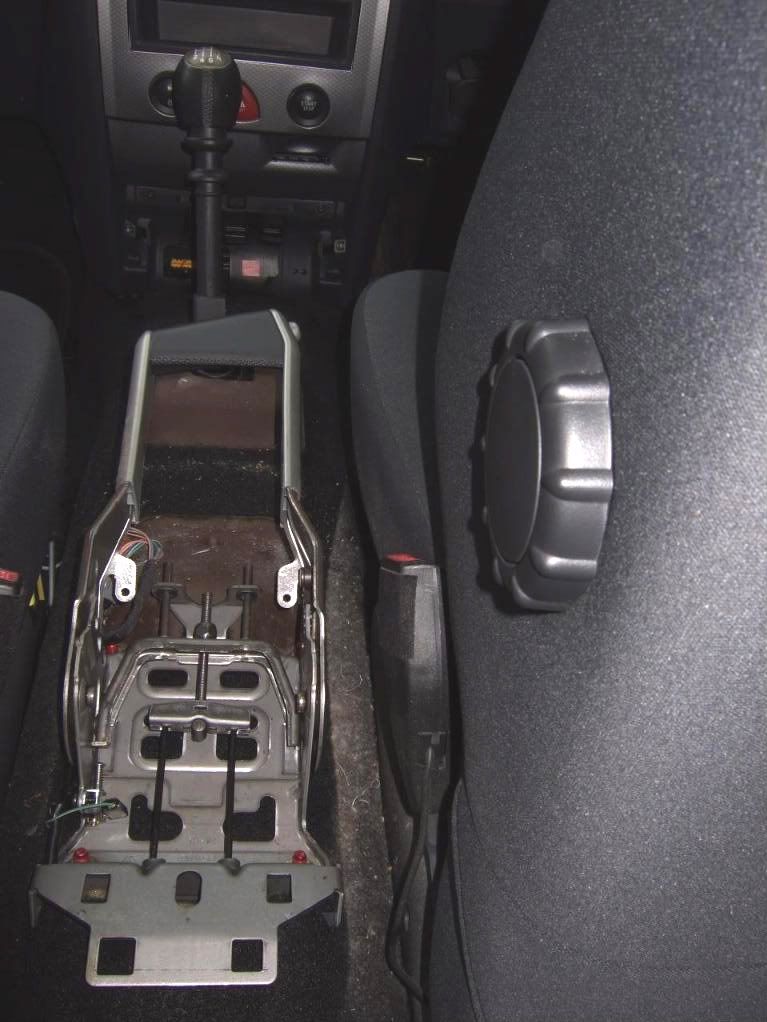
It is an excellent time to vacuum the parts of your car you couldn’t normally reach. As you can see, I didn’t!
7. Use the steel rule to measure the amount of adjustment on the handbrake thread:
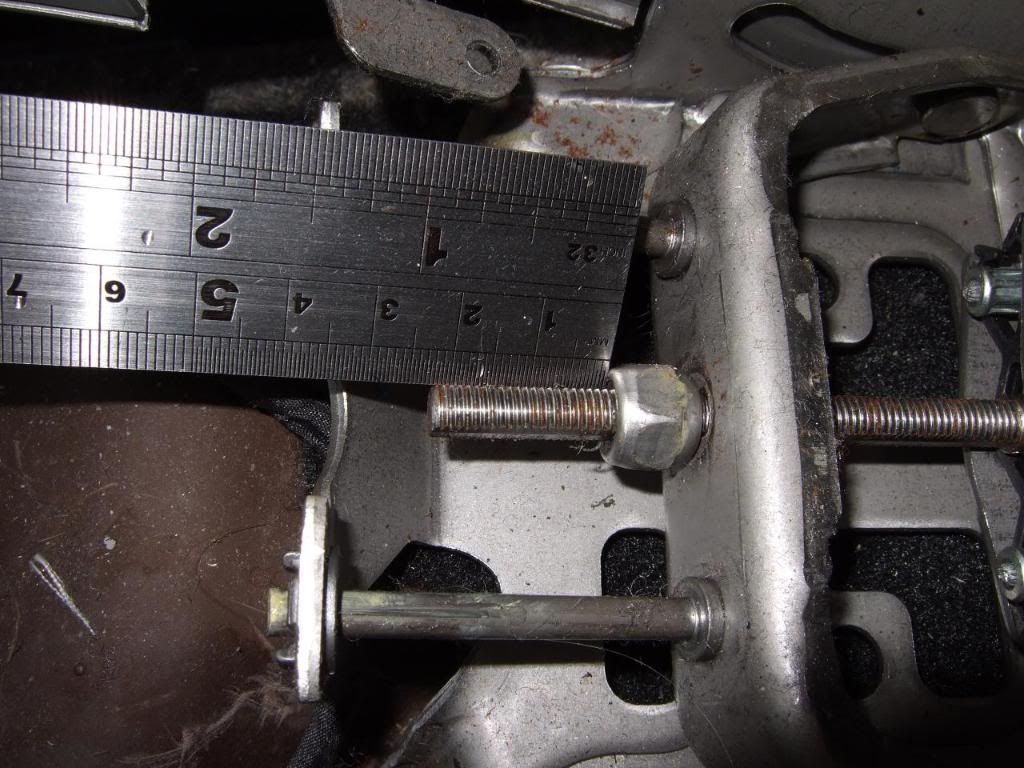
As you can see on the photo, I have 22mm. This is a guide to when you re-assemble and calibrate the new handbrake assembly.
8. Using the spanner, loosen off the nut, until you can remove the brake cables:
They slide out of the balancing bar. One is removed as shown above.
9. Disconnect the handbrake warning light connector – green lead (pull it off, it’s just a simple blade connector):
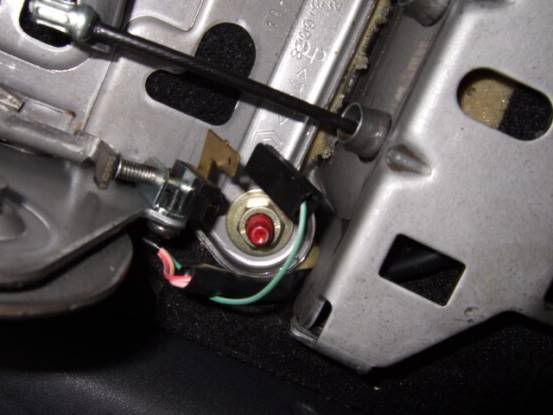
You can also see one of the loose brake cables in the above photo.
10. Using the socket, wrench and extension bar, unbolt the four mounting nuts from the red studs. The handbrake assembly can now be removed. Both loose brake cables can be seen below:
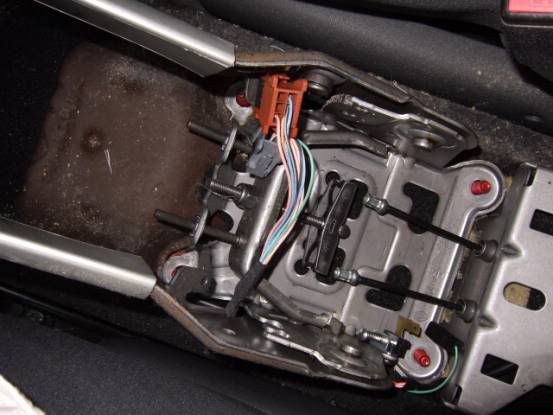
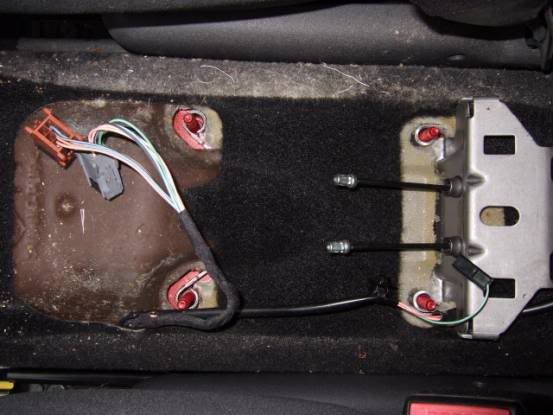
In the above picture, you can see the wiring loom for the heated seat switches (not present on my car). Note the small black lug on the green-cabled warning connector. This is pressed into the handbrake assembly. Push it out using your thumb. It is hard to see on the photo as it is against black carpeting. Obviously at this point, I have removed the handbrake assembly. A post mortem on it will be performed later.
11. Re-assemble in the reverse order with the new part.
12. Notes:
a) Make sure you have adjusted the handbrake using the spanner so that there is no excessive travel on the lever, or that the brakes aren’t binding. I checked the latter by pushing the car back and forth on LEVEL ground. The former is fairly obvious, it should start to engage within a few clicks. You can use the measurement you took with the steel rule to get an approximate starting point. Take good care to get this right – a half turn of the nut will make quite a difference. Do this as soon as you have bolted the new assembly on and re-attached the brake cables (and before you have put any trim back).
b) Leave the gear stick gaiter as the last job. With it pulled up as shown in a previous photo, using the needle and thread and sew it back together. Apply a new cable clip if required. When it is finally pressed back into position, you will not be able to see your darning handiwork, but it is still worth taking a time to do carefully!
13. Un-chock the wheels, and CAREFULLY TEST THAT THE NEW HANDBRAKE WORKS PROPERLY.
I hope this was a useful guide.